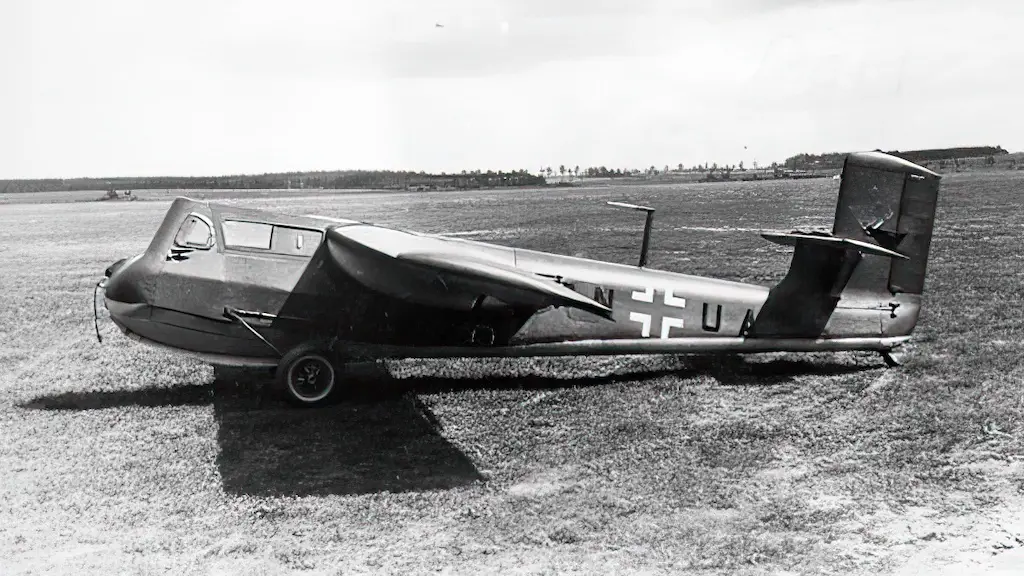
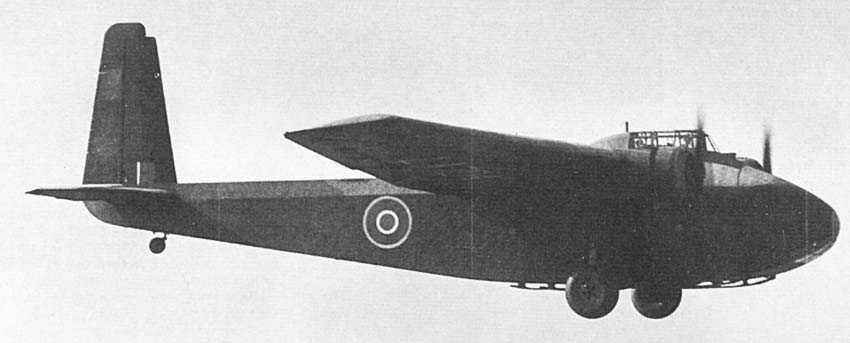
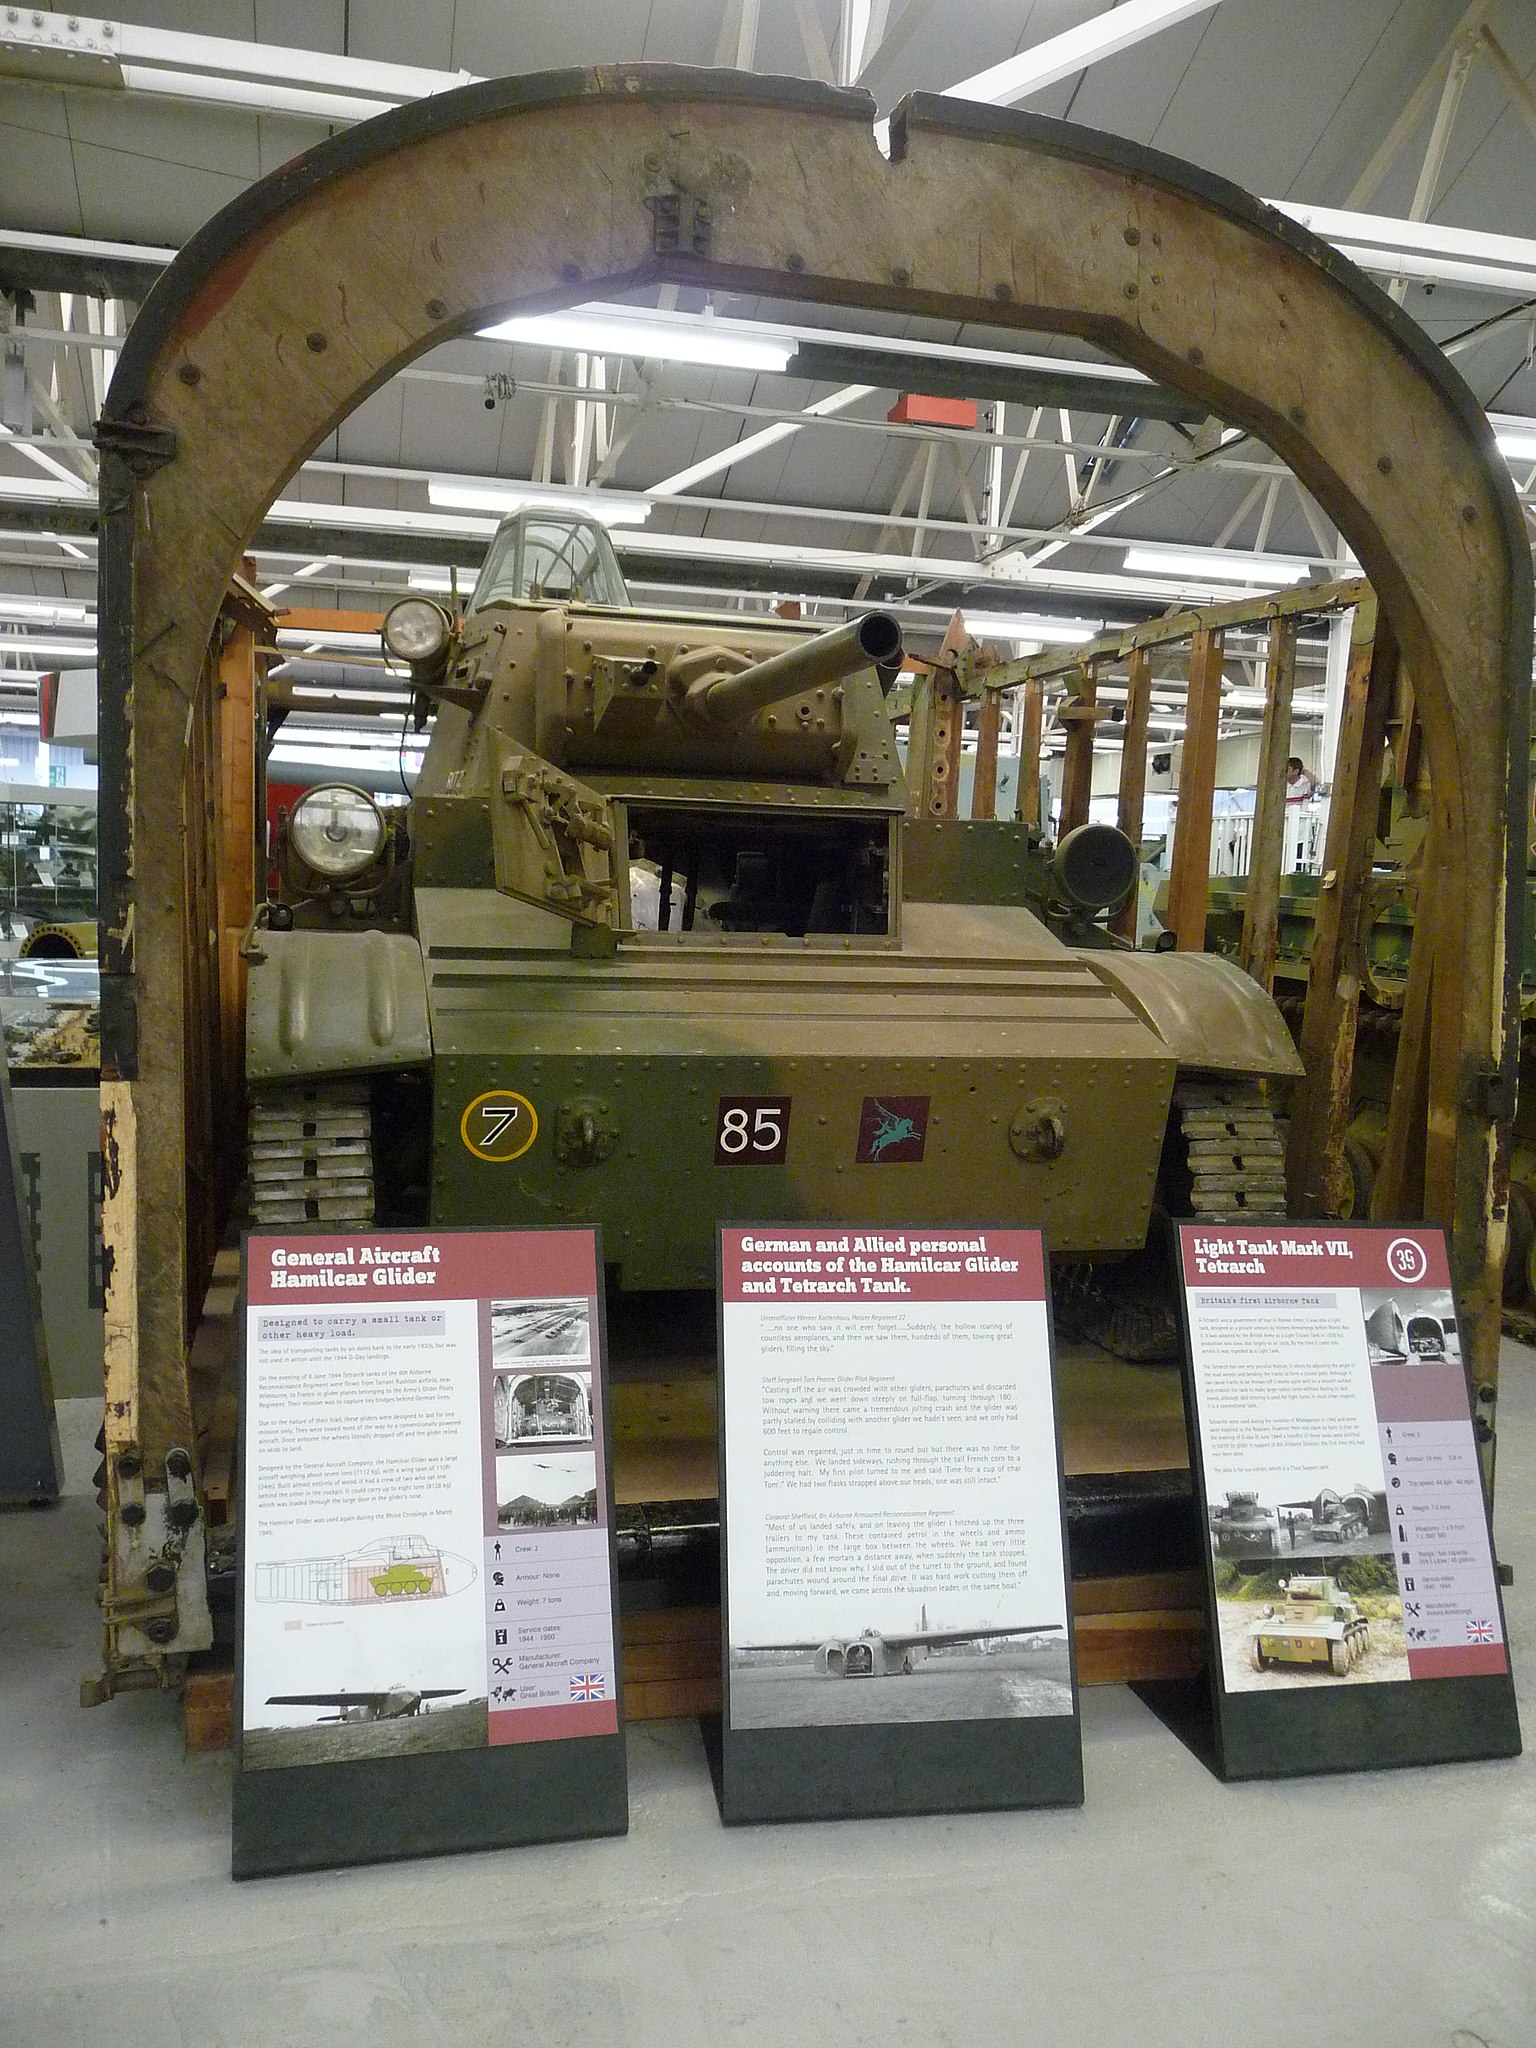
Imagine a glider so formidable that it could transport an entire tank into battle. No, this isn’t science fiction but a historical feat of engineering. The General Aircraft Hamilcar, or Hamilcar Mark I, stands as one of the most astonishing airborne assets employed by the British Army during World War II. This behemoth of a glider was not only designed to ferry heavy loads but could even bring Tetrarch or M22 Locust light tanks directly into the combat zone.
The Birth of a War Giant
In 1940, the British Prime Minister Winston Churchill saw the impact of airborne forces during the Battle of France and quickly ordered the formation of a British airborne establishment. By 1941, various specifications for military gliders began to emerge, with General Aircraft Limited (GAL) selected to develop the last and largest of them. Initially, GAL considered an audacious design where the tank driver would also serve as the glider pilot, but this was soon scrapped for a more conventional approach.
GAL ran into a slew of challenges during the development phase. The British War Office frequently changed the number of gliders it wanted, and GAL itself struggled with poor management and organizational issues. Production delays were so rampant that despite a planned roll-out of 40-50 Hamilcars by the end of 1941, that milestone was only reached in June 1944. In total, just 344 Hamilcars were produced by the time production ended in 1946.

Design and Features
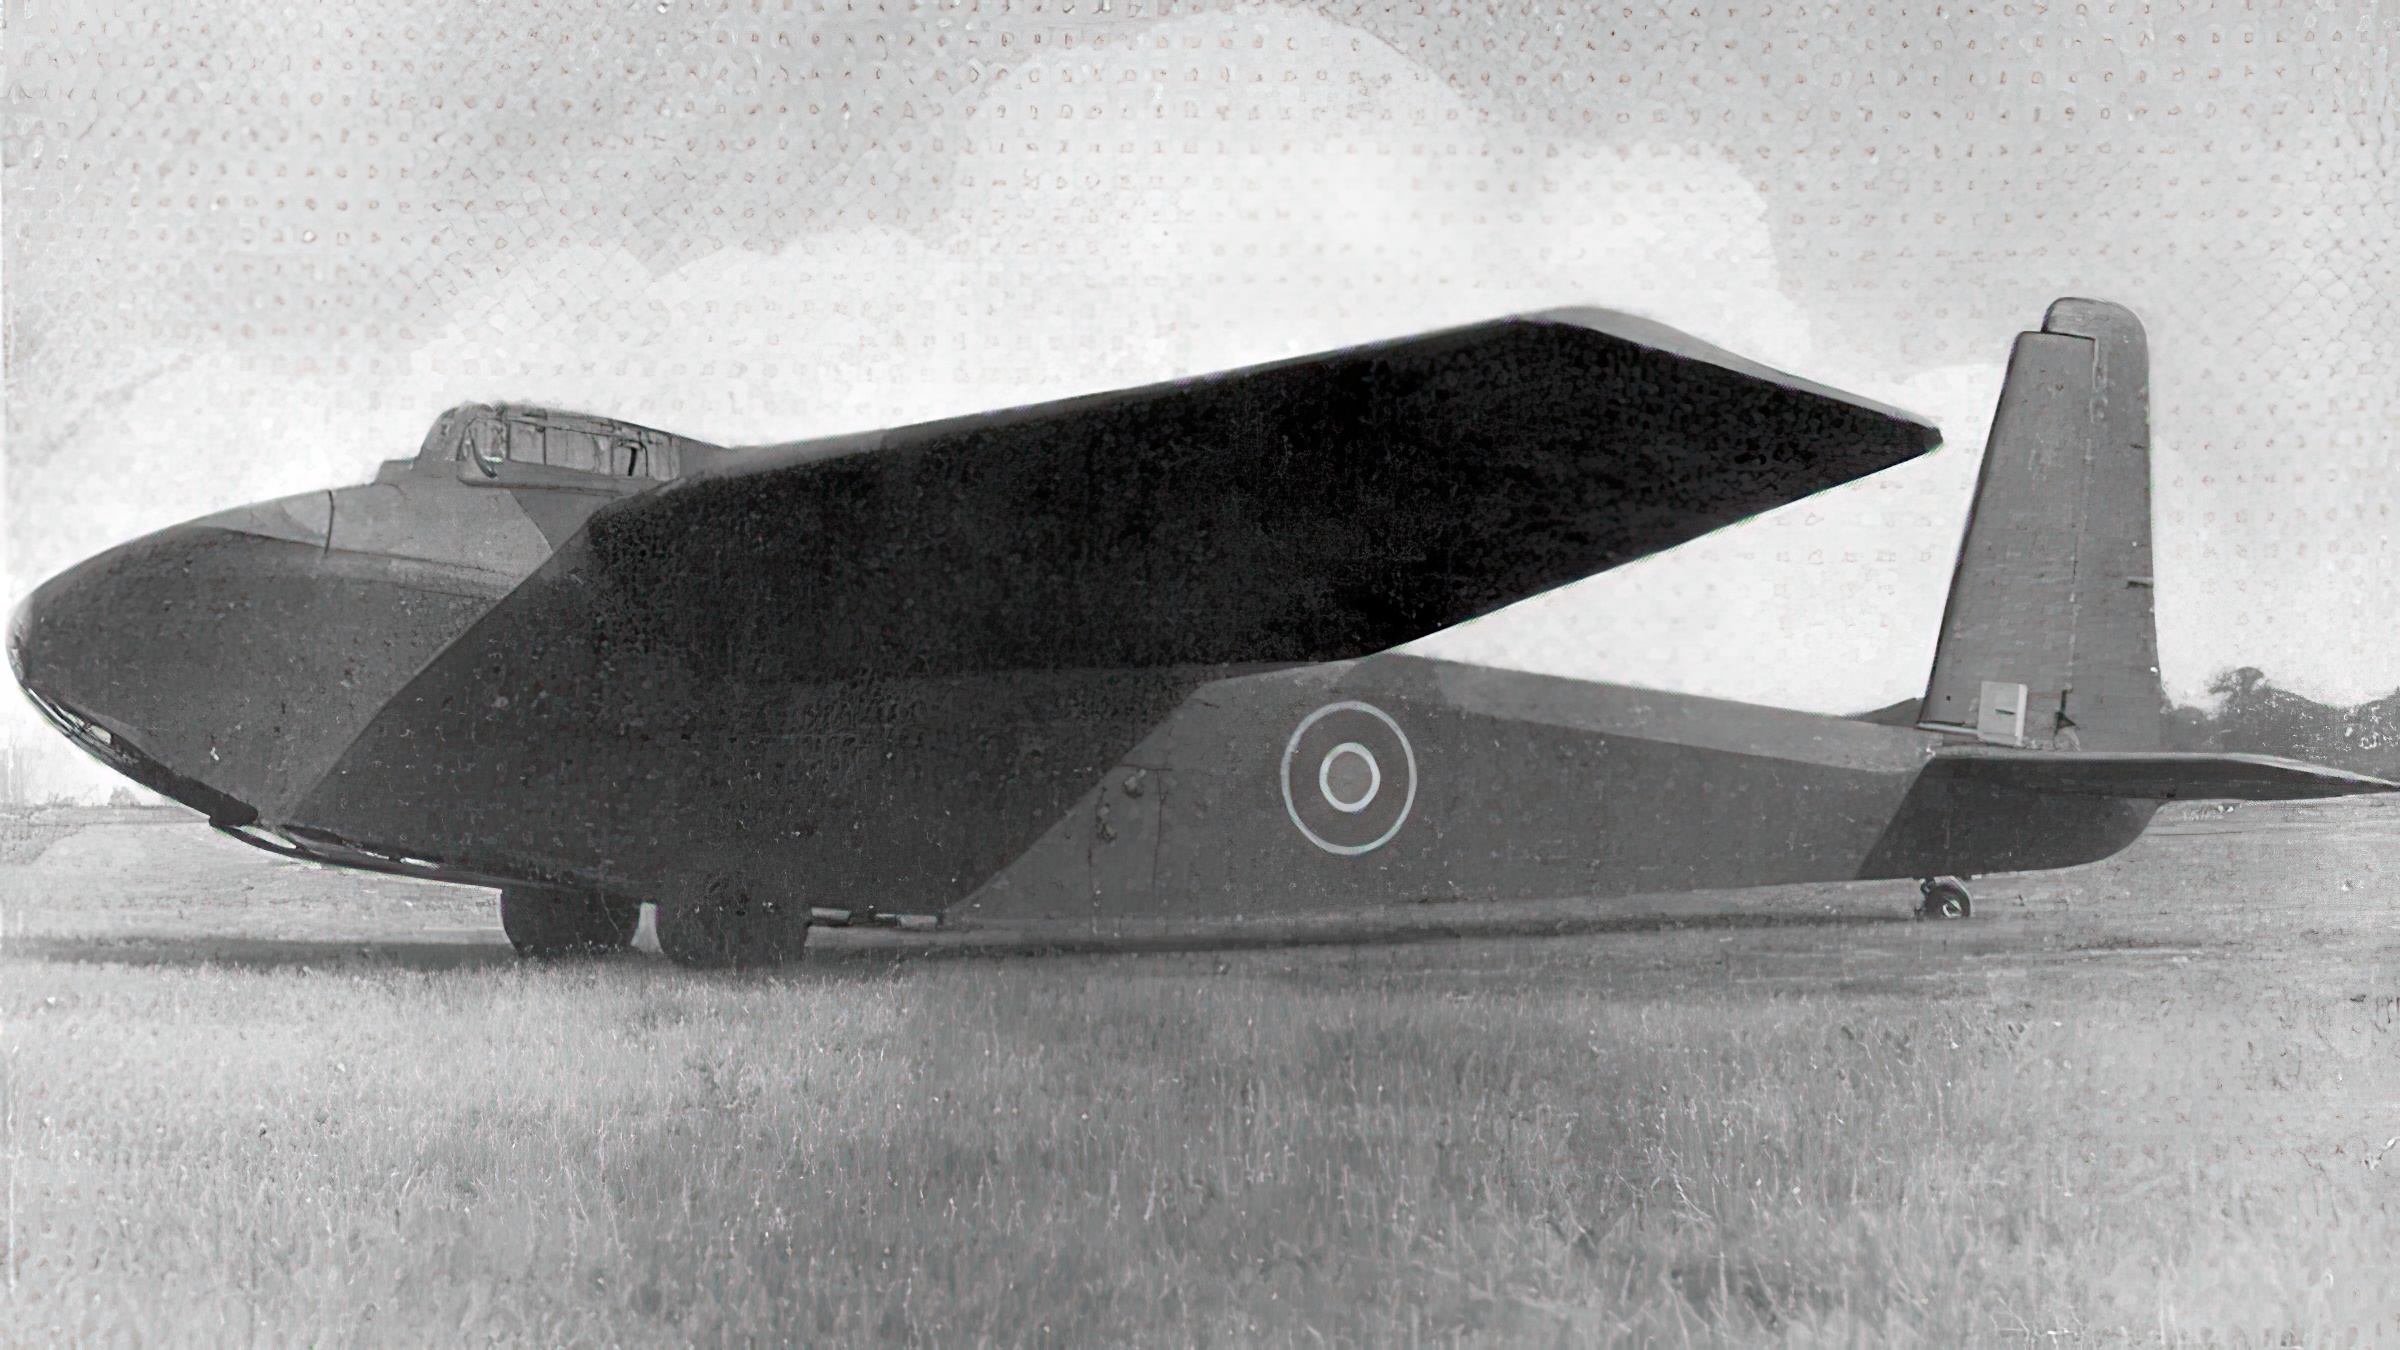
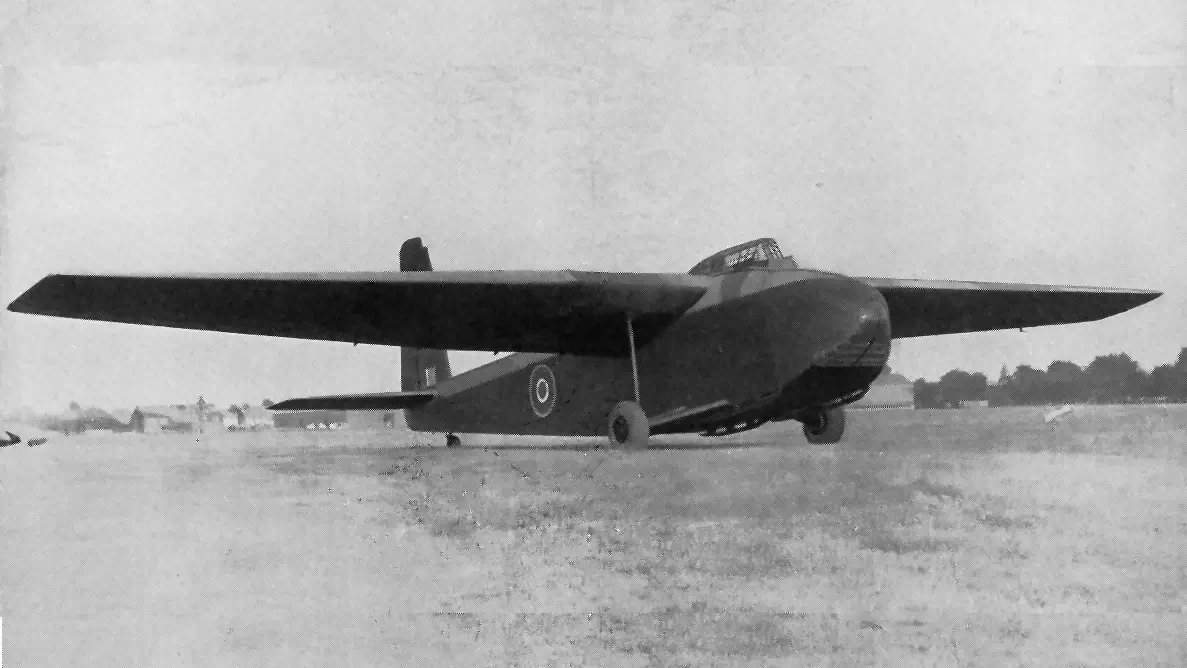
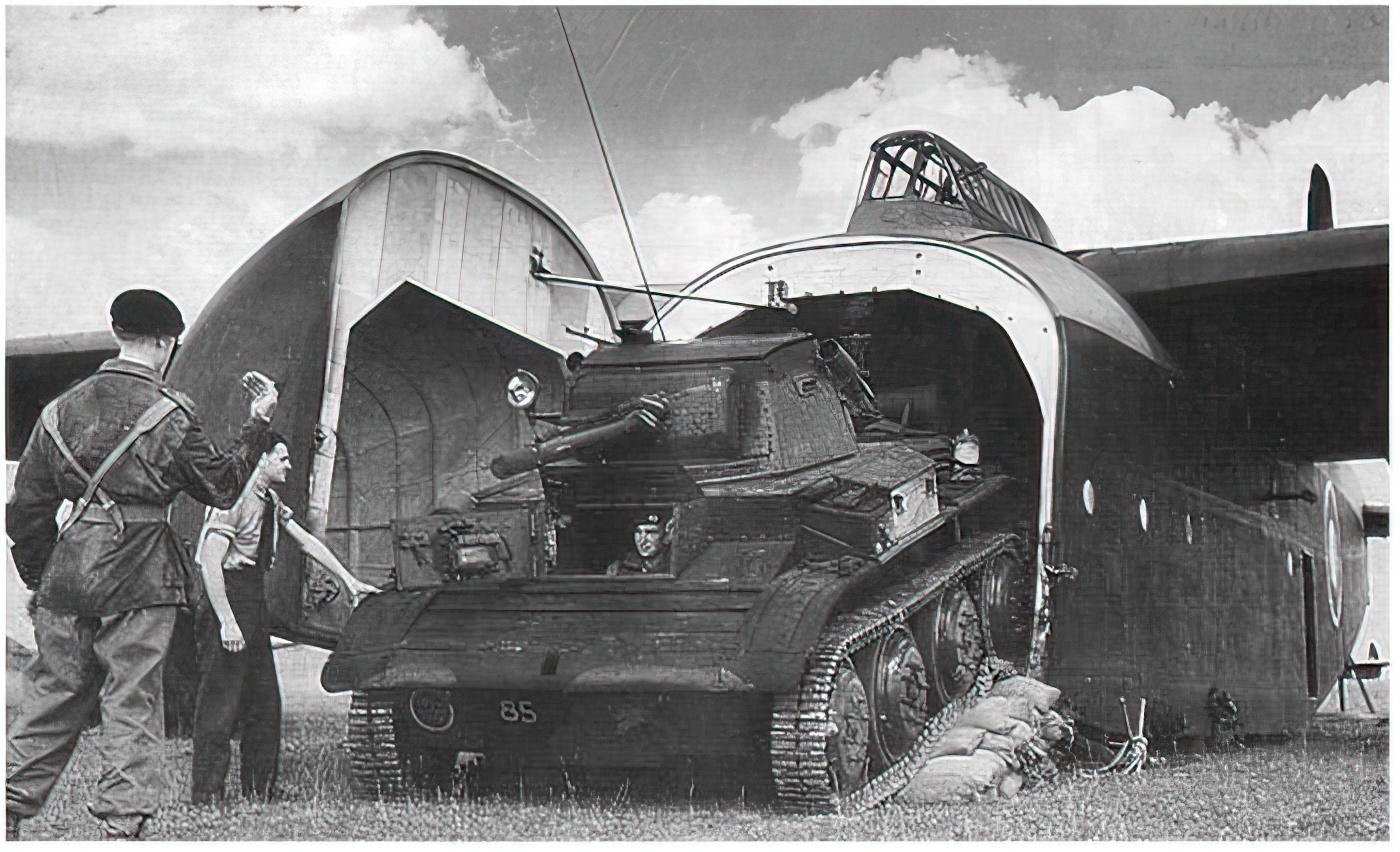
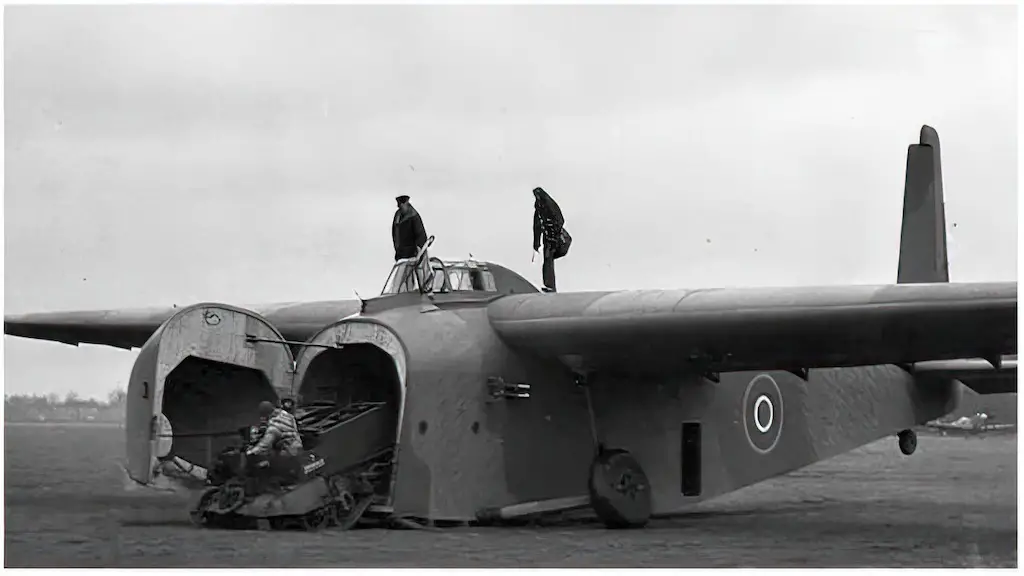
Built predominantly from birch and spruce wood, with fabric-covered plywood skin and high-grade steel reinforcements, the Hamilcar was a testament to resourcefulness. The glider’s dimensions were staggering: a wingspan of 110 feet, a length of 68 feet, and an empty weight of 18,400 pounds. Designed for maximum cargo space, both the wings and cockpit were positioned above the fuselage. This made room for a massive cargo compartment, which could house a light tank or two Universal Carriers.
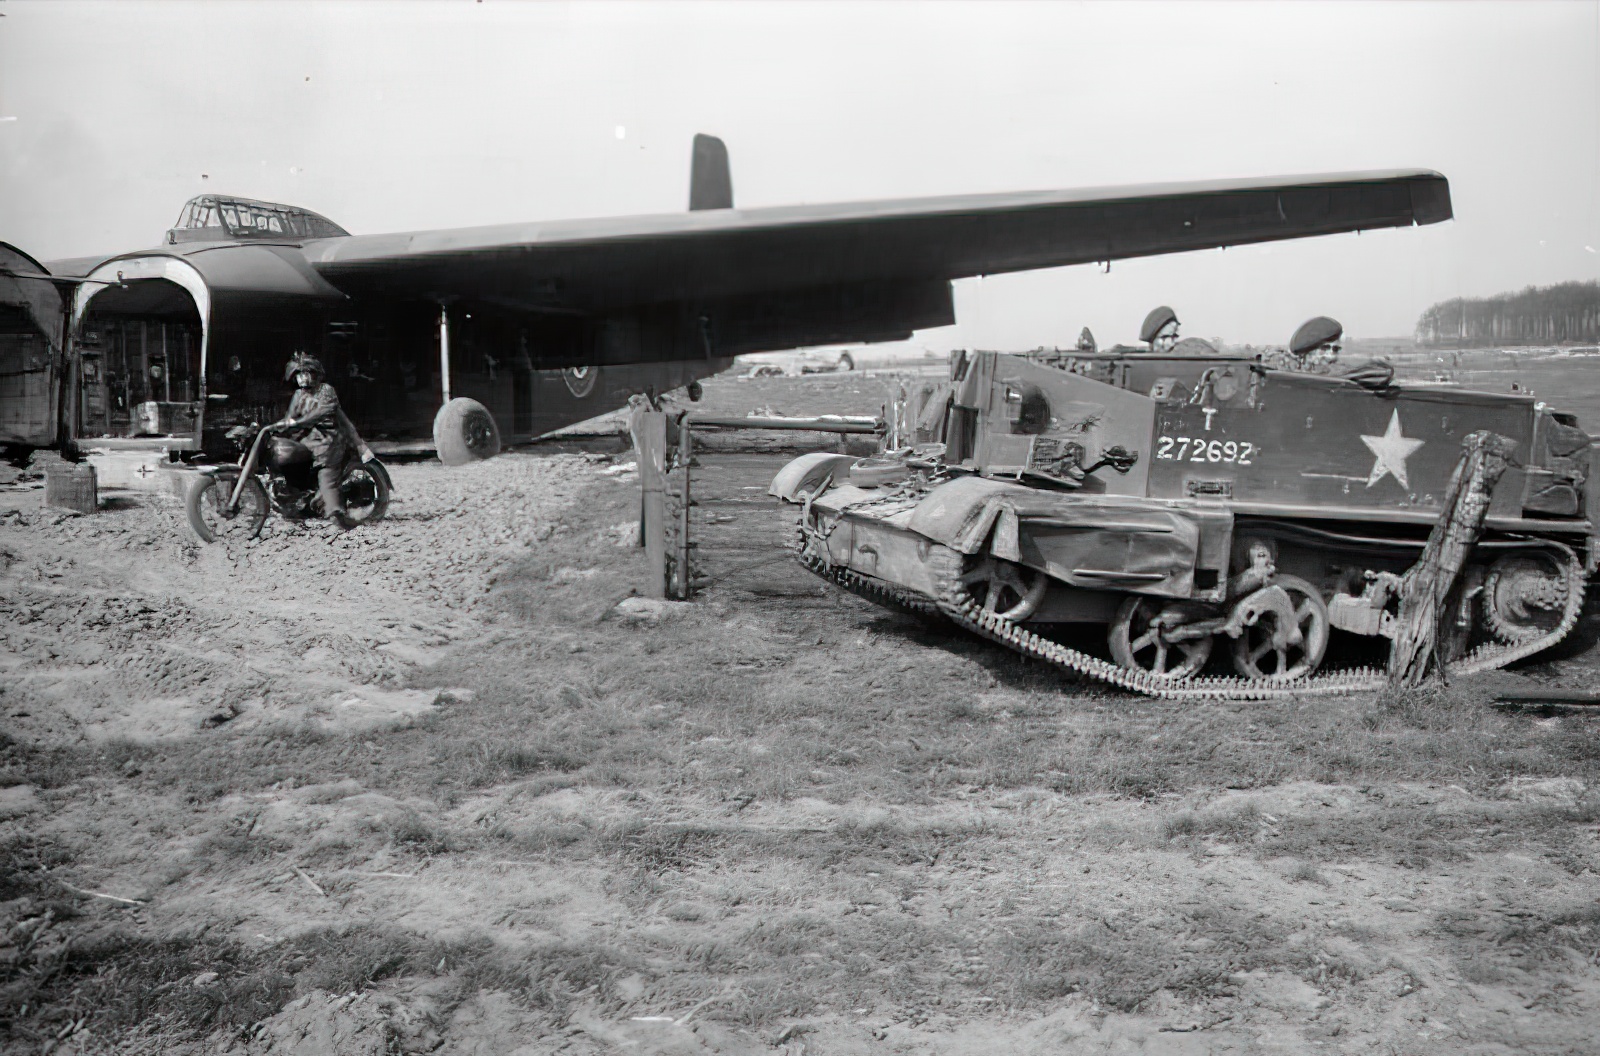
The glider’s landing process was innovative too. Pilots could adjust large flaps for a steep and rapid descent, allowing for precise landings. Once on the ground, a tailwheel landing gear with deflatable shock absorbers lowered the fuselage, facilitating the unloading of tanks and other heavy cargo. Even the tanks’ engines were started just before landing, with special ducts installed to expel the exhaust fumes.
Into the Thick of Battle
Despite its cumbersome size and slow speed, the Hamilcar first saw action in June 1944 during Operation Tonga, carrying anti-tank guns, vehicles, and Tetrarch light tanks to Normandy. It was used again in September 1944 as part of Operation Market Garden and finally in March 1945 during Operation Varsity, where it carried M22 Locust tanks. While they were easy targets for anti-aircraft fire, the Hamilcars generally proved successful in their missions.
An interesting development was the Hamilcar Mark X, a powered version aimed at extending its operational range for the Pacific War. However, the war in the Pacific ended before this variant could see combat.
Training and Deployment
The Hamilcar glider entered the service at a critical time for the Allies during World War II. Following completion and assembly, each Hamilcar was flown to RAF North Luffenham for cargo loading before final deployment to RAF Tarrant Rushton. Due to its size and cargo capability, it couldn’t be towed empty; Universal Carriers or concrete blocks were often used as ballast. Training primarily took place at RAF Tarrant Rushton from late 1943 to early 1944. Pilots underwent dual instruction before solo flights, engaging mainly in “circuits and bumps” to master take-off and landing maneuvers.
Operation Tonga
Operation Tonga, part of the Operation Overlord (the D-Day landings), was the Hamilcar’s first combat operation. It involved transporting the British 6th Airborne Division to eastern Normandy to secure the eastern flank of the Allied seaborne landings. Approximately 350 gliders were deployed, including 34 Hamilcars. These carried vital equipment including 17-pounder anti-tank guns and Tetrarch light tanks. While most Hamilcars reached their designated landing zones, some encountered problems like broken tow ropes or missed landings, highlighting both the promise and risks associated with these enormous gliders.
Operation Market Garden
The next significant operation involving Hamilcars was Operation Market Garden, aimed to secure a route into Germany by capturing key bridges. The 1st Airborne Division used approximately 650 gliders, including 39 Hamilcars, to transport anti-tank guns, Universal Carriers, and even American engineers and their equipment. However, the operation faced delays, weather problems, and enemy resistance, causing some Hamilcars to land off-target or be destroyed.
Operation Varsity
By March 1945, the Allies had reached the River Rhine. Operation Varsity was planned to support the amphibious assault across the Rhine. The 6th Airborne Division used 440 gliders, including 48 Hamilcars, to seize strategic points and support the river crossing. Despite losses due to engine failures and anti-aircraft fire, the majority of the Hamilcars landed successfully, delivering vital equipment and forces behind enemy lines.
Post-war Service and Decommission
The Hamilcar’s last combat mission was Operation Varsity. However, it remained in service for several years post-war, mostly for training and heavy-load transportation. By December 1945, 64 were recorded at RAF Tarrant Rushton, but this number dwindled quickly due to disposal and attrition. The last few operational Hamilcars were used in airshows and public displays until the mid-1950s, after which they were phased out as obsolescent.